
- Activate Electronic Waivers
- Create Waiver
- Accepting Waivers in Studio
- Accepting Waivers Online
- Managing Accepted Waivers
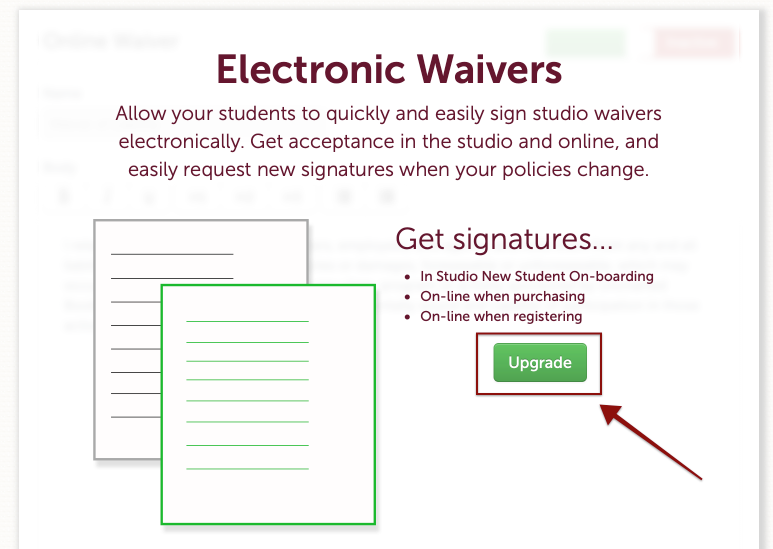
Activate Electronic Waivers
The electronic waivers comes with our premium plan or can be added to the base plan for $25 a month. To activate waivers, go to the menu on the top right with your studio name and select Electronic Waiver. From there you can click the upgrade button to activate waivers.
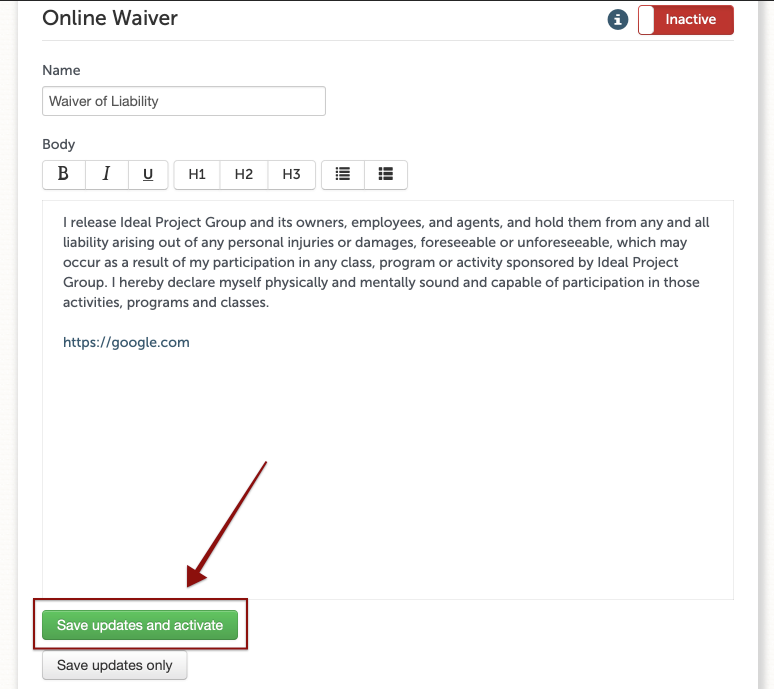
Create Waiver
To create a waiver, go to the menu on the top right with your studio name and select Electronic Waiver. We provide some default language you can use for your waiver or you can create your own. Once done, save and activate.
NOTE: If you update your wavier with new details, all students will need to accept the newest version.
Accepting Waivers in Studio
For your students to accept your waiver in studio, go to add and select accept waiver.

Lastly, hand them the device so they can fill out their info and accept your waiver. Or you can open this page on a separate device that can be used to accept waivers in studio. Also, this page is public so you can send it to anyone you'd like so they can fill it out.

Once this form is filled out the student will receive a copy via email and a copy will be attached to their profile in Tula.
Accepting Waivers Online
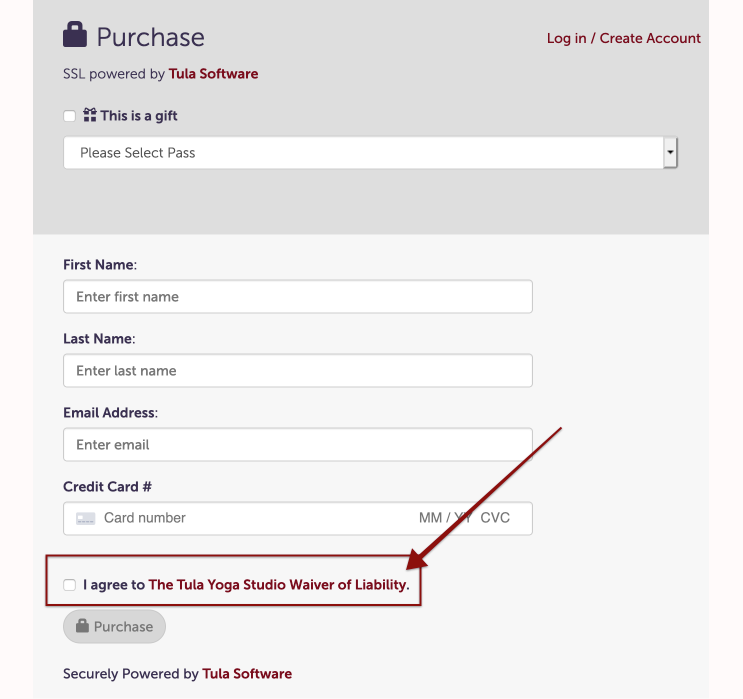
Once your waiver is created and activated, your students will be able to accept the wavier any time they interact with your studio online. If they make a purchase, sign up for a class or create an account, they will need to accept your waiver to proceed. If they have already accepted your waiver and are logged into Tula then we will not ask them to accept the waiver again.
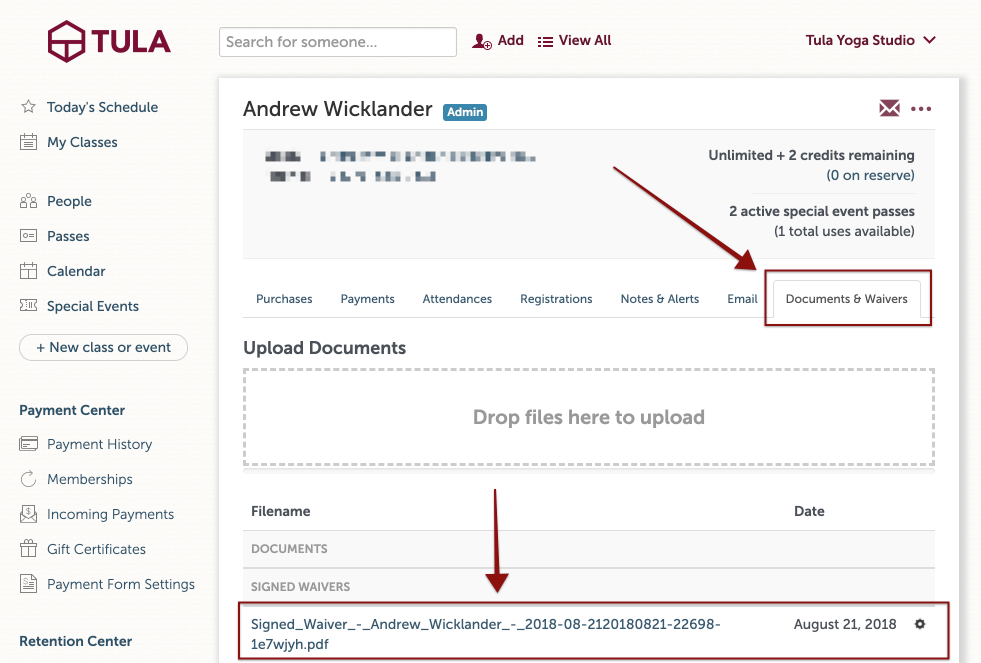
Managing Accepted Waivers
Once a student accepts your waiver we upload one to their account in Tula. We also have a student filter and waiver flag when a student checks into class that will help you see who has or has not accepted your waiver.
To view a students accepted waiver, go to their profile page and click on the docs and waiver tab. There you will find the accepted waiver.
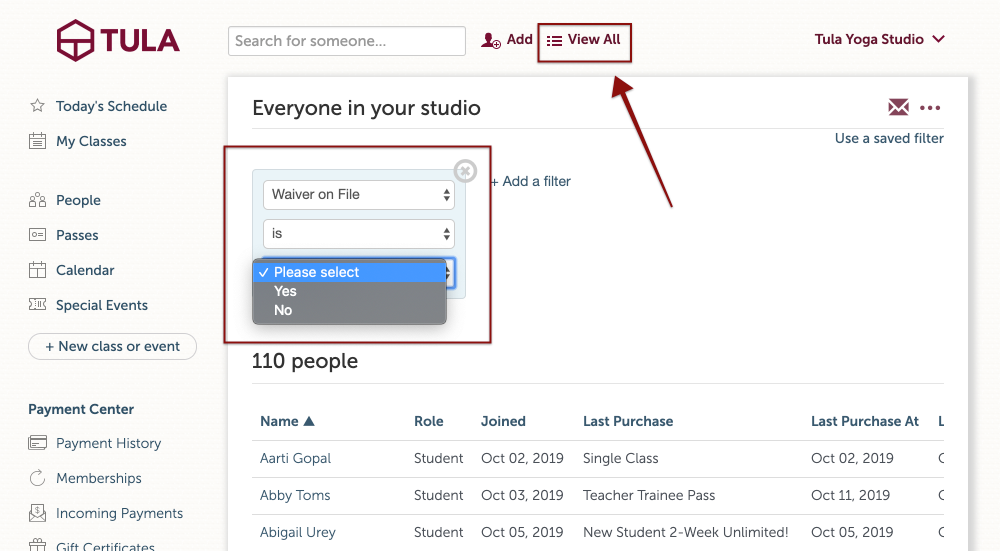
If you need to run a report to see who has or has not accepted your waiver, click on view all up top by the search box. From here, set the filter to waiver on file is yes or no and that will filter down your student list.
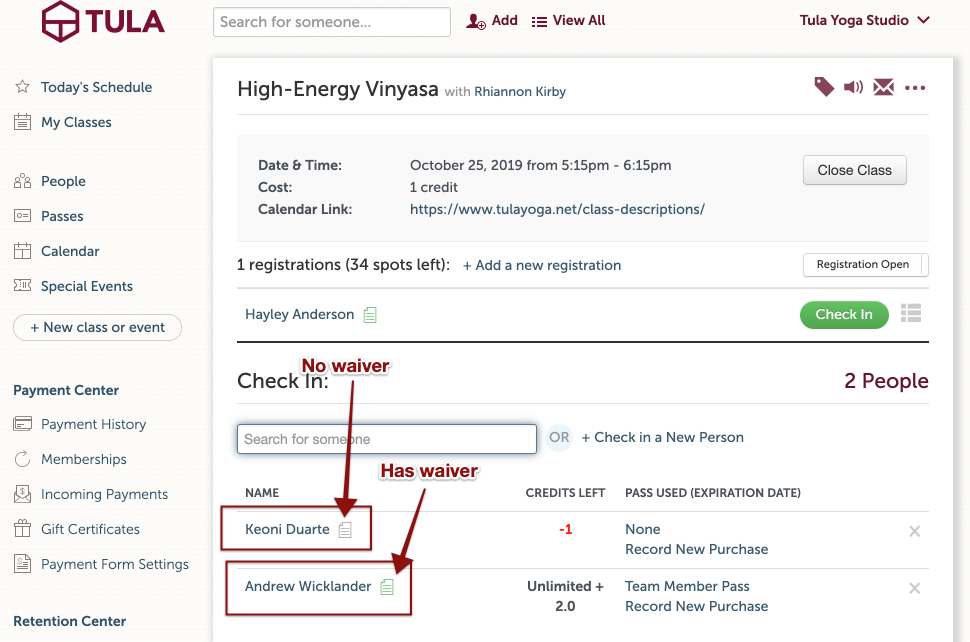
When checking in a student, we will show you who has a waiver on file and who does not, with a waiver flag. If the student has a waiver the icon will be green, if not it will be gray.
If you have any questions or need a hand, please reach out to us!