
The Tula software payment center allows you to accept payments online, store your student’s credit card information, set up recurring memberships with automated billing and perform one time charges for individual class purchases should you choose. Beyond this, you can view purchases by transaction type, see payment history by student, view revenue reports across your entire system, and send automated receipts.
Learn how to sign up for Stripe and connect it to your Tula account to start taking credit card payments. Also, how to setup your online store and automated receipts.
Setup Stripe Account
We are deeply integrated with one of the most innovative payment providers around, called Stripe. Stripe has no setup fees, no monthly fees, and clear per transaction pricing (2.7% + $0.30). Even better, they have a sign up process that can be completed in 3 minutes.
With our Stripe integration, you can automatically charge your customers every month for memberships, and also perform one time transactions.
Create and Connect a Stripe Account to:
- Store credit cards and automatically charge people for memberships each month.
- Accept credit cards using your own website.
- Easily conduct one time transactions right from within Tula.
If you'd like to use the online payment form and/or setup a recurring membership you must first connect to your Stripe account. If you do not have a Stripe account, you can sign up for one in a few easy steps.
First login your Tula account and go to menu -> Status: Not Connected -> Connect with Stripe.
If you already have a Stripe account simply click on Connect my Stripe account and type in your credentials. Once connected you will be redirected back to Tula where you will see your connection status.
If you do not have a Stripe account, you can easily create one by clicking on the sign up link and fill out the sign up form.

Note: We use Stripe solely to process charges, and distribute money into your bank account. Everything you need to do to conduct purchases, set up memberships, and issue credits is done from within Tula Software.
Setup Online Store
Your online store is the embedded payment form that you put on your website so students can make online purchase. You control what passes are available to purchase by going to payment form settings that is under payment center in the left navigation of Tula.

Select the passes you want in your online and also what passes you what available to buy as a gift pass then save. Now you are ready to customize and embed payment forms.
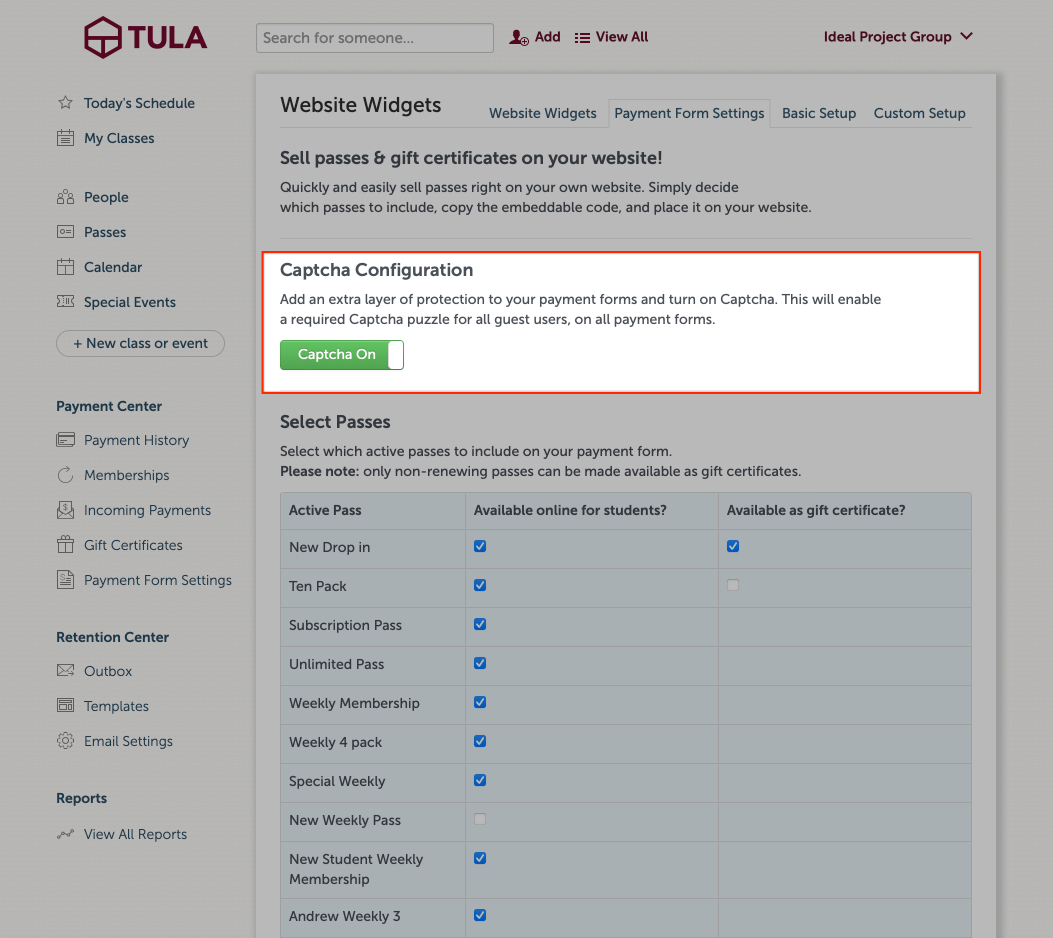
Captcha Configuration
All our payment forms will have Invisible Captcha enabled for all guest users for your protection against bots that might attack with spam payments. However, if you want to add a little bit more protection, you can enable checkbox Captcha for guest users. This will require the guest user to complete the challenge when making a payment. If a student is logged in, we never show the checkbox Captcha.
Receipt Settings
To setup your receipt go to menu -> receipt settings.

When you charge someones credit card, you can choose whether or not you would like them to receive a receipt. You can customize the from name, reply-to email address, subject and also create a custom message.
Once you are done customizing the receipt you can save it and send out a test email to yourself to make sure looks awesome!
Note: This test email will be sent to the email address associated with your account, and will be addressed to you.