
Filling up your studio for every class is a key to success so enabling a waitlist will help make sure all spots are filled if someone who is registered for in-person drops out.
Enable Waitlist
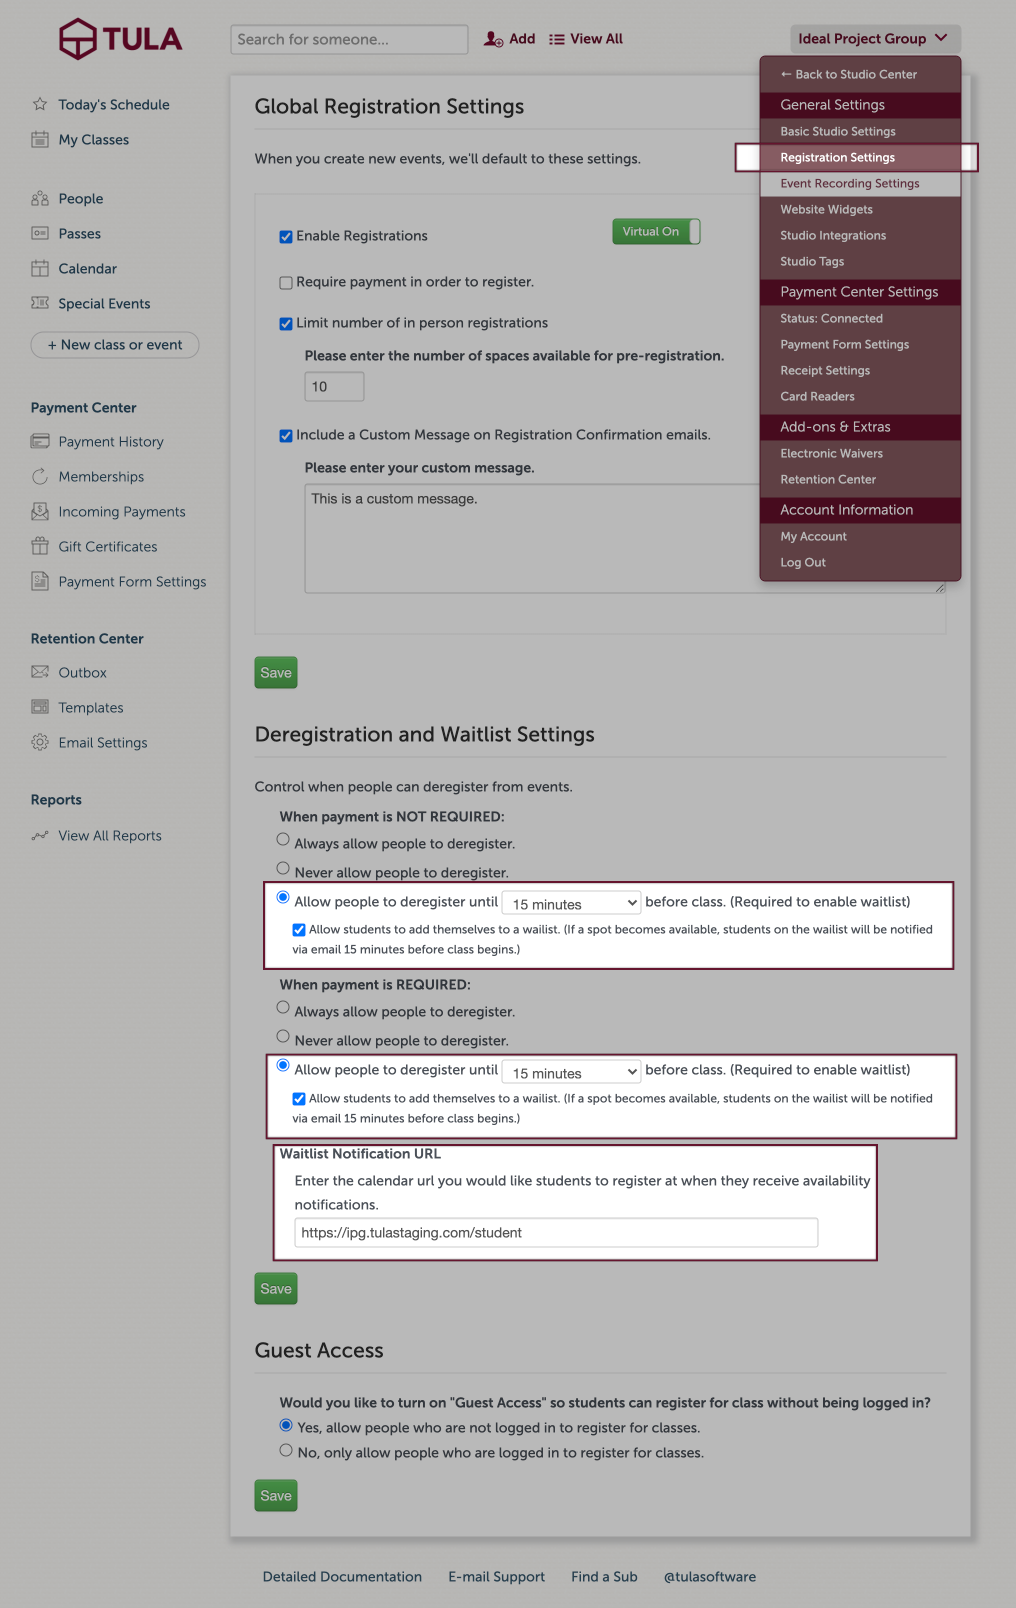
Go to the menu on the top right in Tula, select registration settings and there you will find the De-registration and Waitlist settings. In order to enable the waitlist you must allow students to deregister up until a set time before class. This time limit will be used as a threshold for waitlist email notifications. Once you allow students to deregister until a set time before class, you can enable a waitlist for your classes.
Next, add the url that you want to include in the in-person open spot notification. In most cases this url will be where you have your Tula schedule embedded on your website.
Joining and Managing the Waitlist
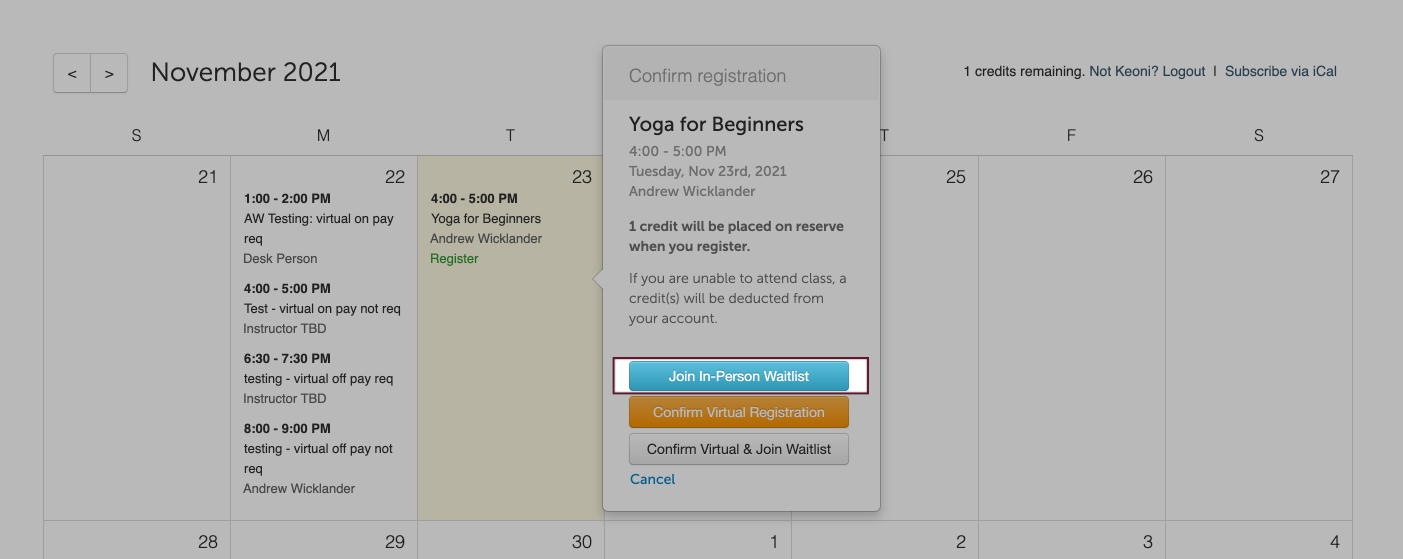
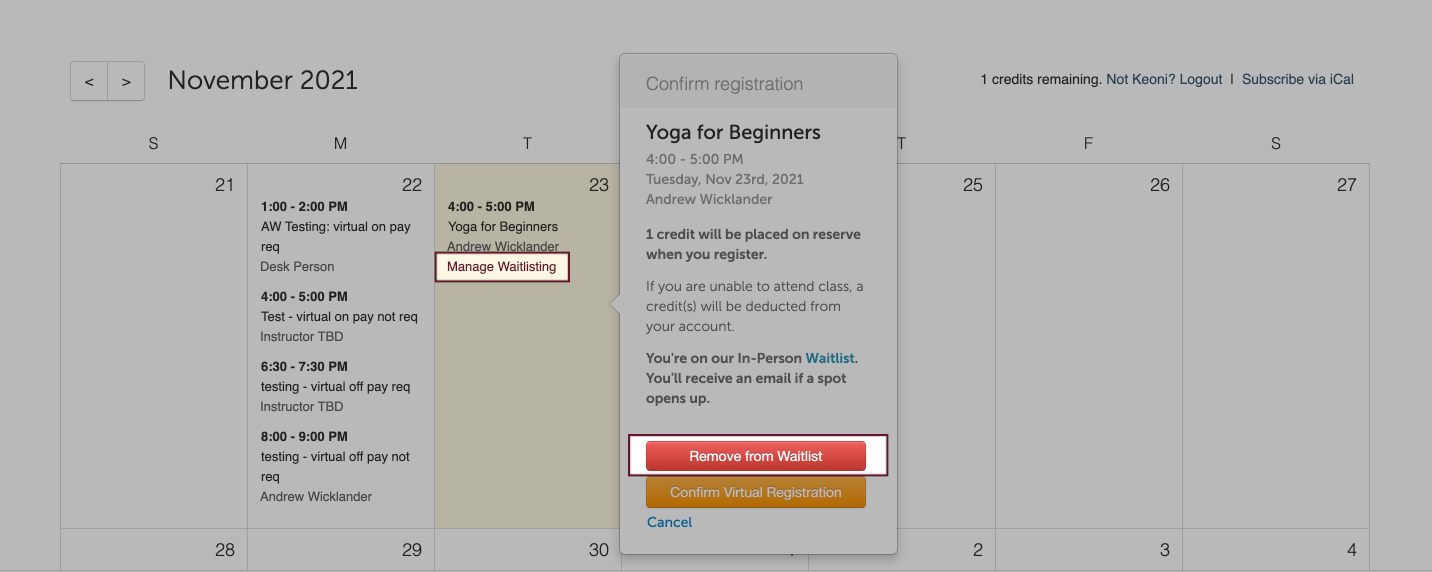
Once your in-person registration limit is met and if waitlists are enabled, your students will have an option to join the waitlist on your Tula calendar.
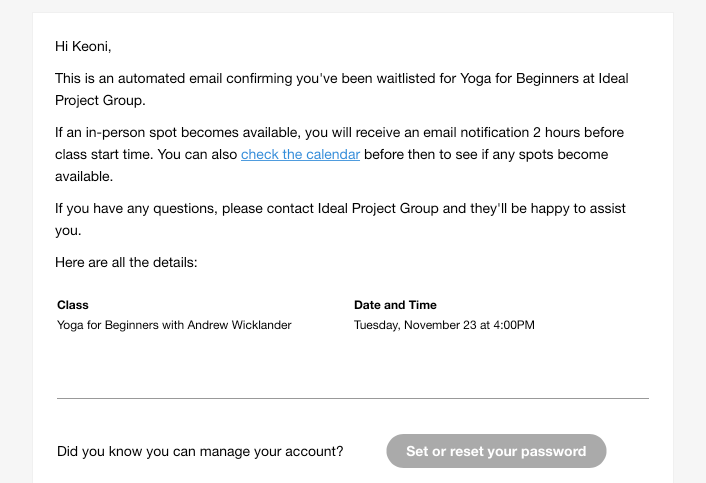
Once on the waitlist, the student will receive an email confirmation with instructions on how to join the in-person registration list once a spot opens up.
Students can return to the calendar to manage waitlisting if they wish to be removed from the waitlist. Please note that students cannot be removed from the waitlist from the admin side of Tula.
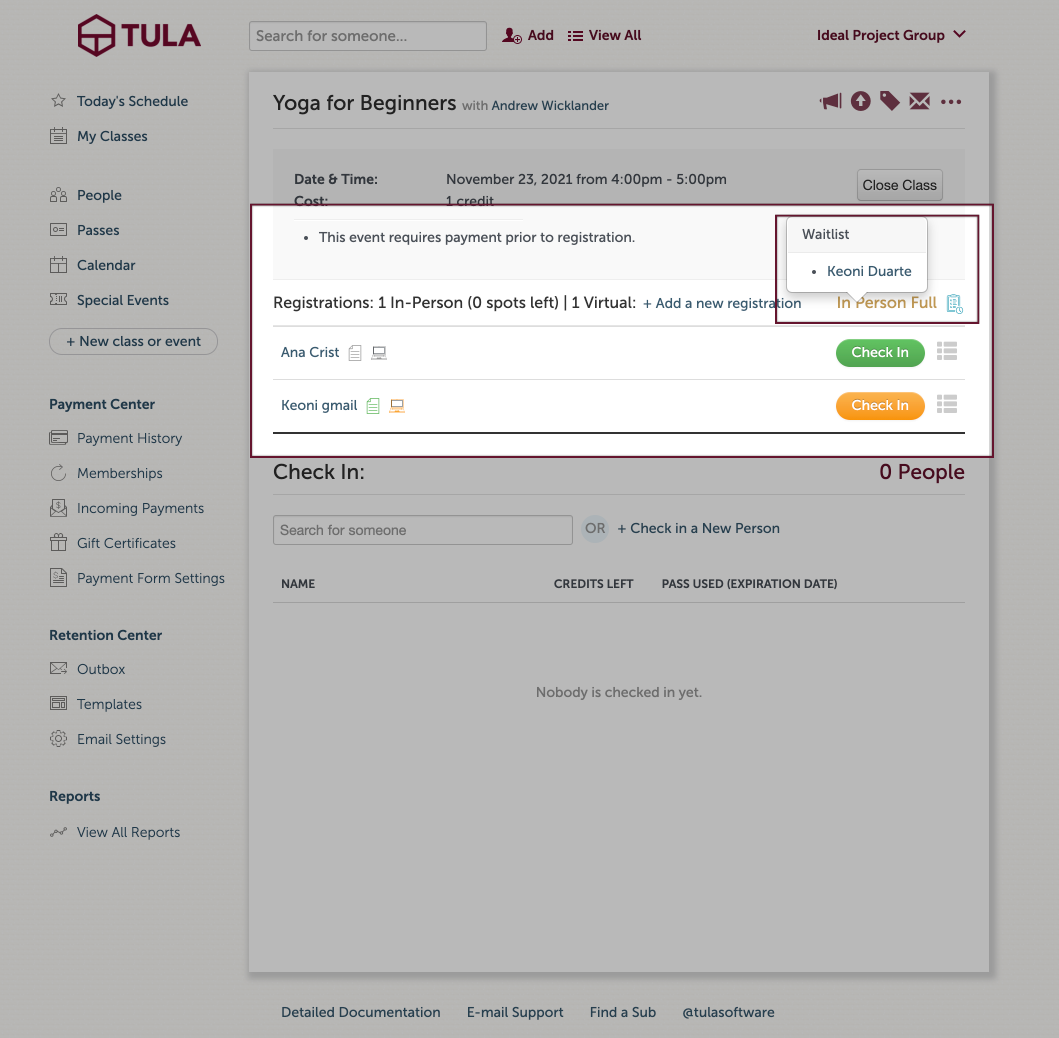
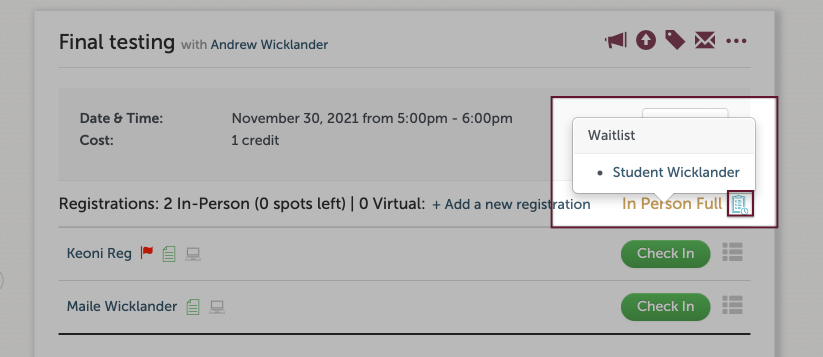
The waitlist can be viewed by the studio from the check-in page and clicking on the blue clipboard icon.
Registering for In-Person
A student can return to the calendar at any time and if there is an open spot they will be able to register. Also, if a spot is open once the time threshold set in your settings is met, all students on the waitlist will receive an email notification letting them know they can register for in-person.
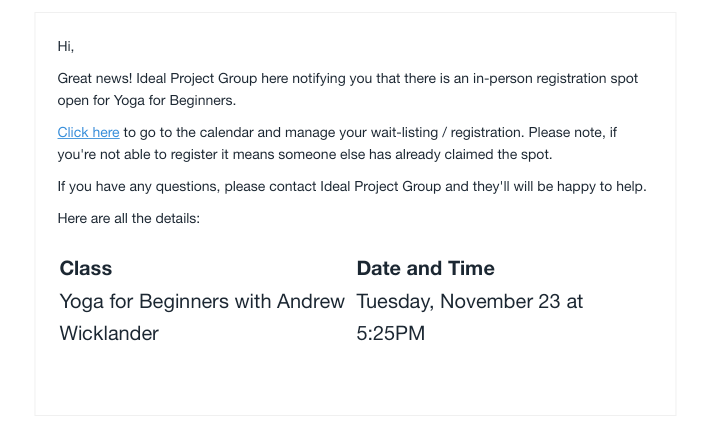
If the student clicks the link in the email they will be taken to your waitlist notification url where they can register for in- person.

Like always, if you have any questions, please Contact Tula Software support.