- Create a Tula Studio Account
- Basic Studio Settings
- Create Schedule
- Create Passes
- Connect Stripe
- Create Custom Subdomain
- Setup Online Store
- Receipt Settings
- Migrate Credit Card info to Stripe
- Import Students
- Embed Website Widgets
- Upgrade Tula Account
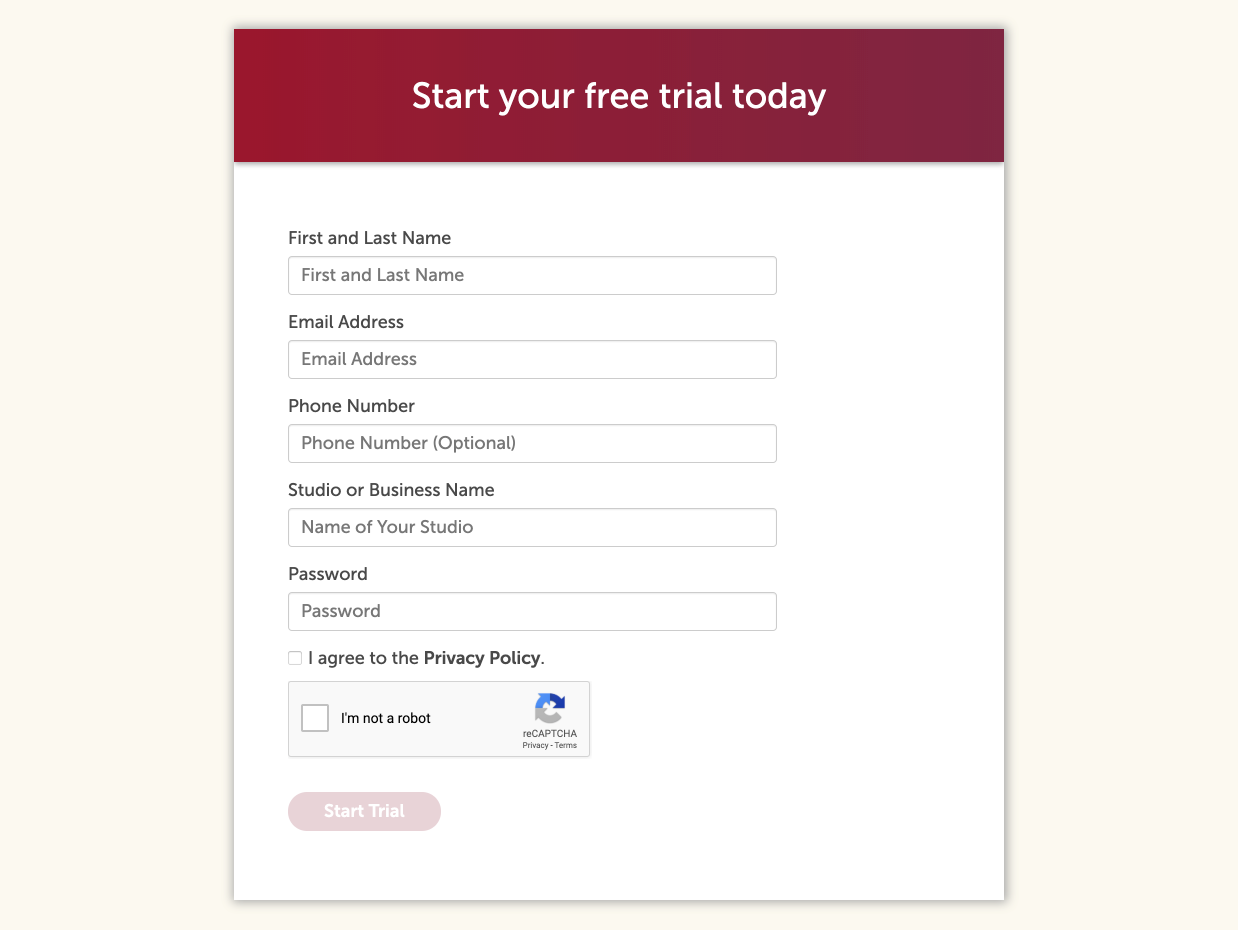
Create a Tula Studio Account
To create an account head over to our marketing page and click on sign up. Enter your name, email, phone, studio name and set a password. Once you are signed up you can use Tula for 2 weeks for free! If you need a hand with anything at any time just let us know!
NOTE: If you're a student at an existing Tula Studio then you can visit their website to create an account. Creating an account from the steps above is for studio accounts only. Questions?
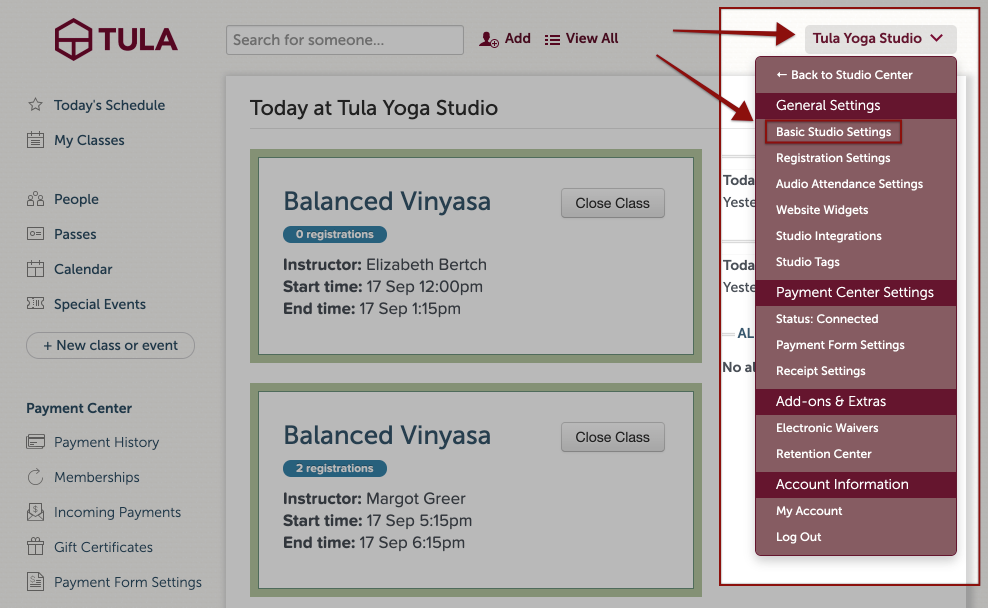
Basic Studio Settings
Setting up your basic studio settings and registration settings will make working in Tula much easier and avoid future issues.
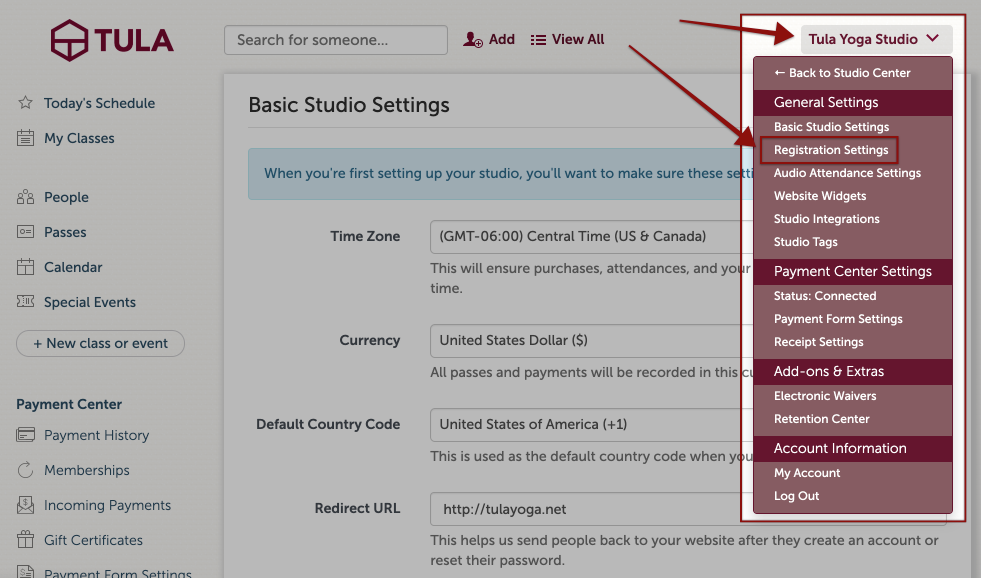
Go to the menu on the top right where you will see your studio name and select Basic Studio Settings.
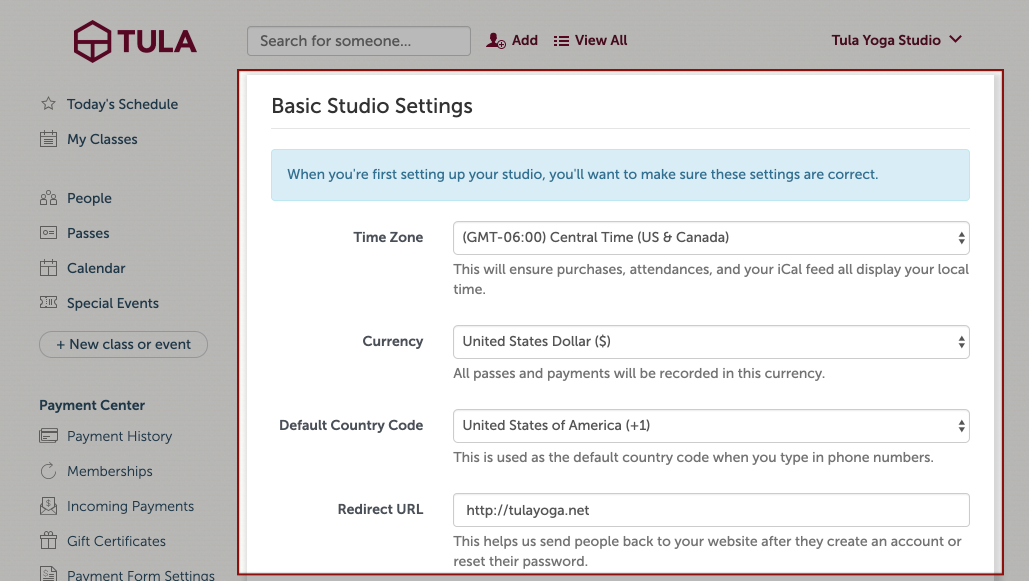
Now set your timezone, currency, country code and redirect url.
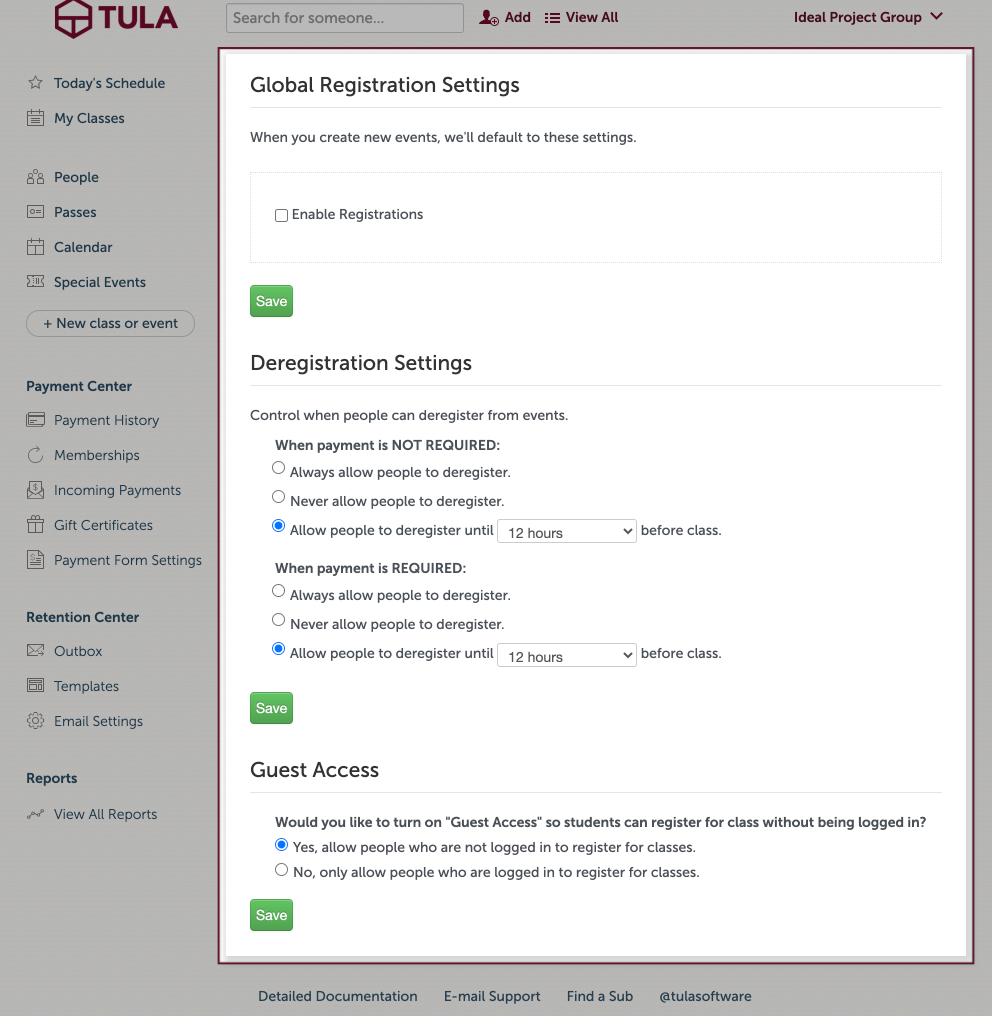
Click on the menu on the top right again and select registration settings. For more info about registration, check this out!
Complete the registration settings and save!
Create Schedule
With Tula this process is fast and easy and can be done in minutes. For a quick outline of creating your schedule, this is the place. If you need a more in-depth section with FAQs, check this out!
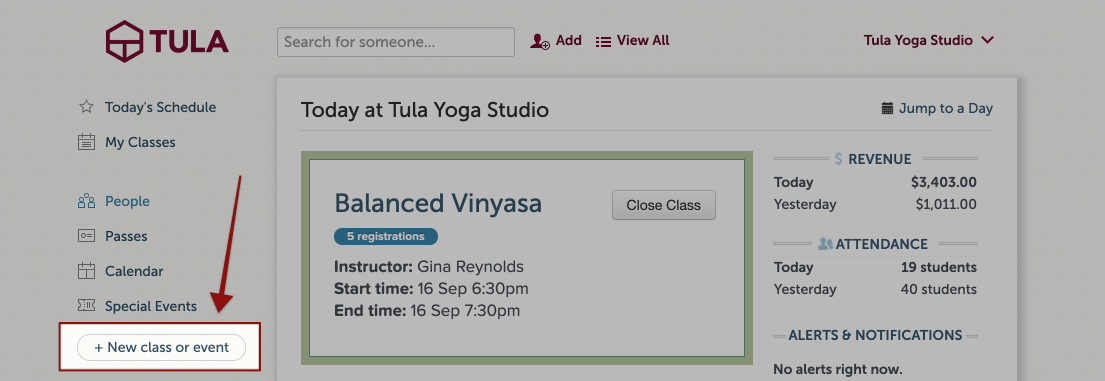
To start your schedule, go to +New class or event.
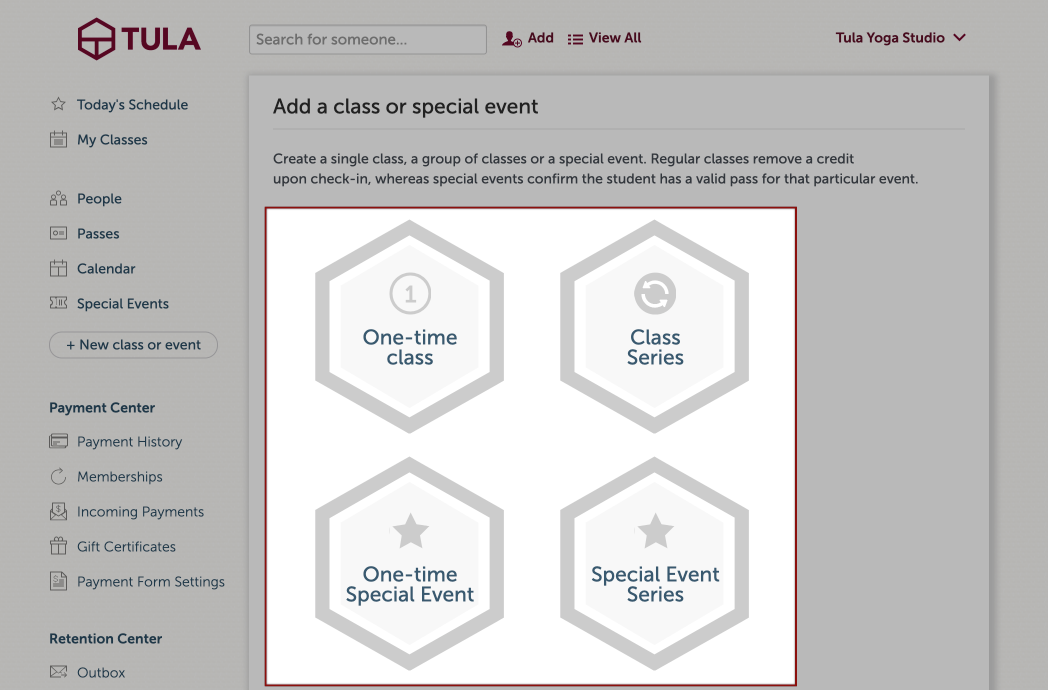
Select the class or event schedule type
Fill out class or event details and save. Now, time for passes!

Create Passes
Creating the passes that you sell at your studio. Here again, the process is fast and easy. Also, if you still need more details you can go here!
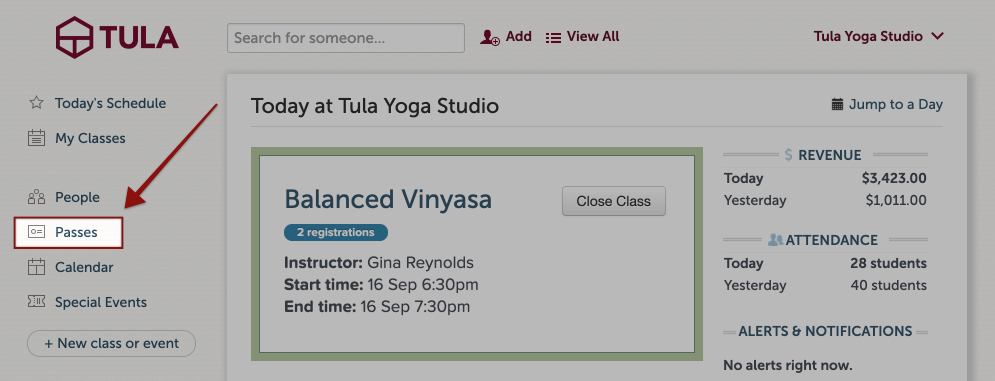
To start your building your passes, click on Passes.
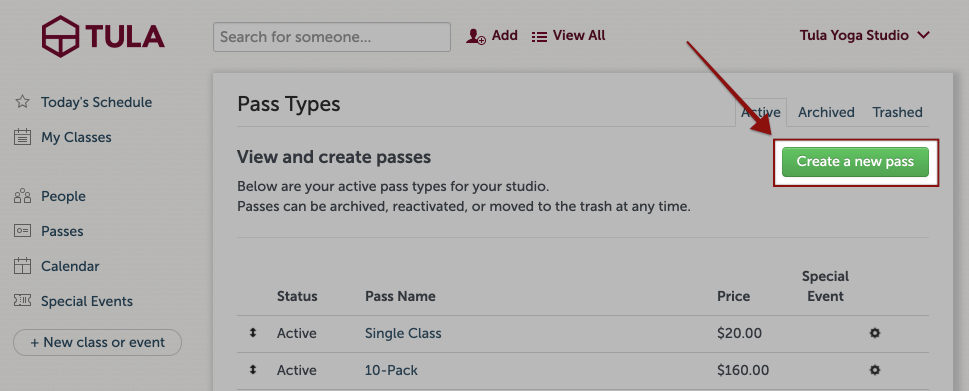
Now, Create a new pass.
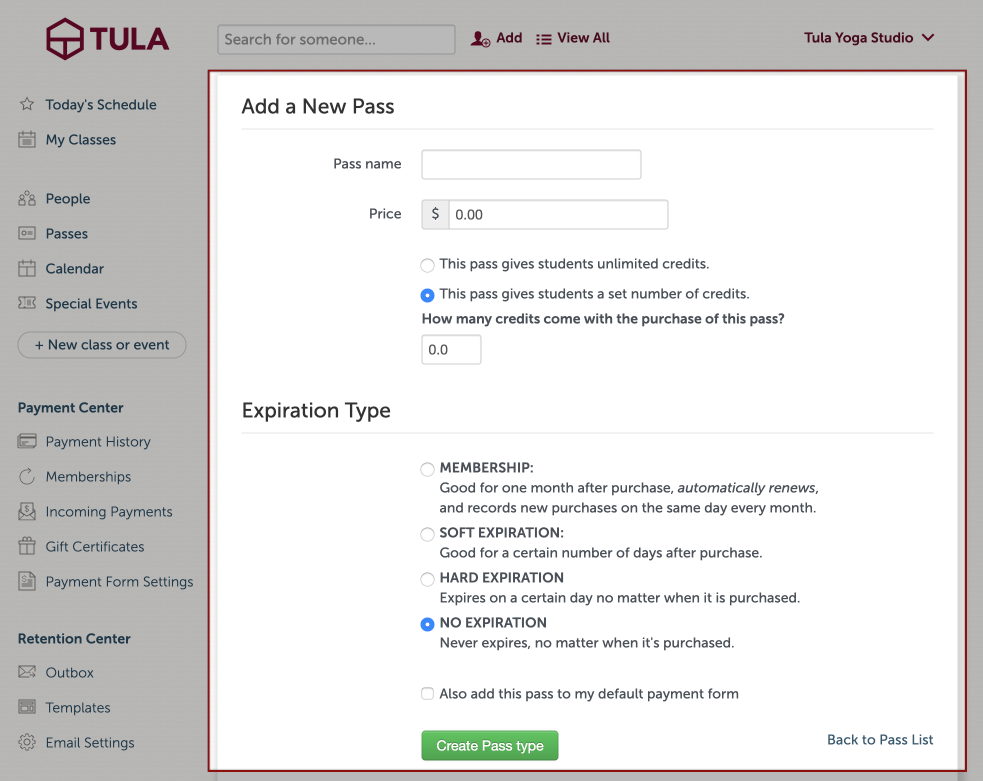
Fill out class details and finish your pass menu.
Connect Stripe
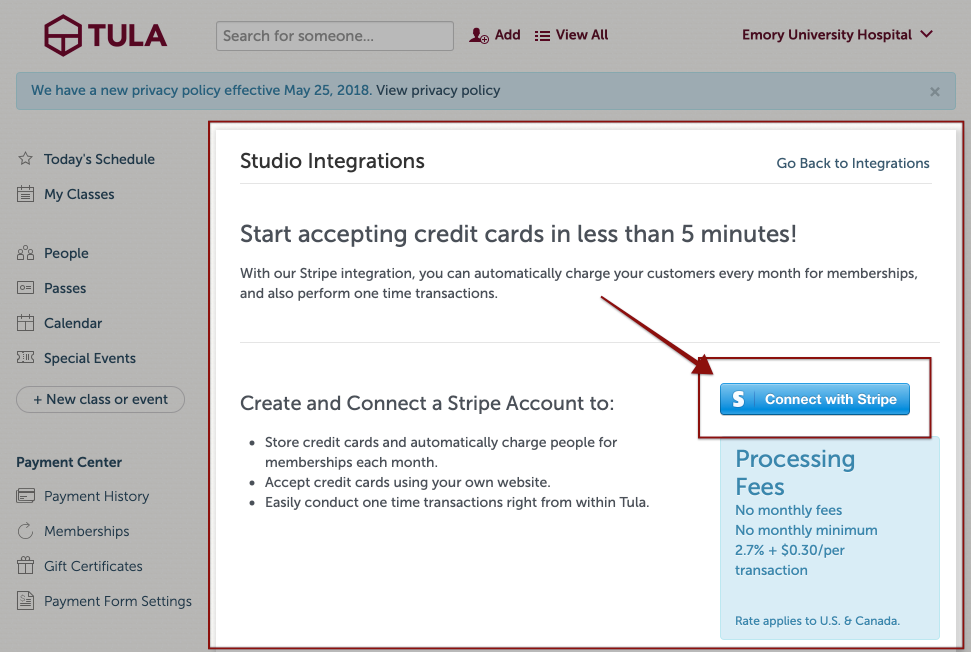
To start accepting credit cards in minutes you can connect a Stripe account to your Tula account. If you need more payment center details, this is the place to look!
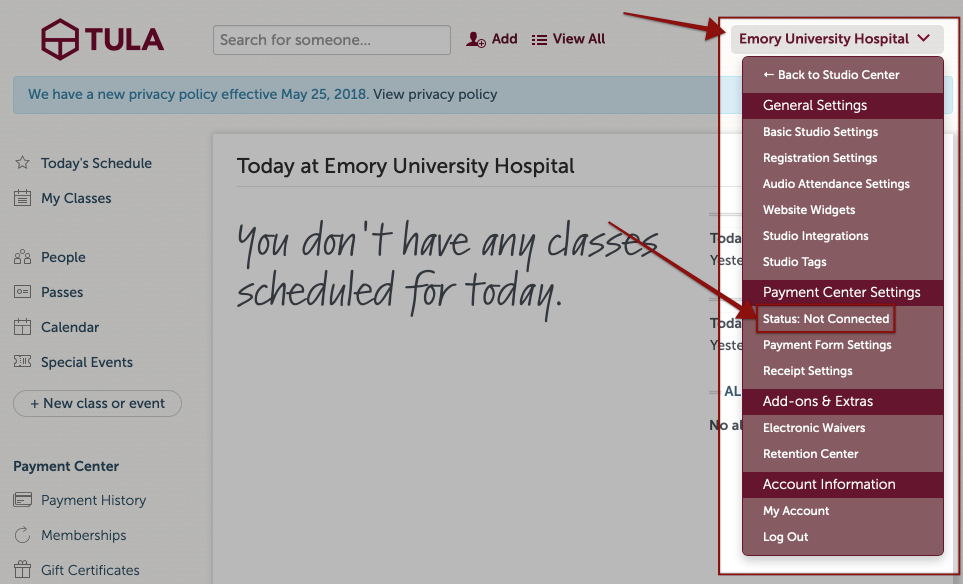
Go to the menu on the top right and select Status: Not Connected.
Next, click on Connect with Stripe.
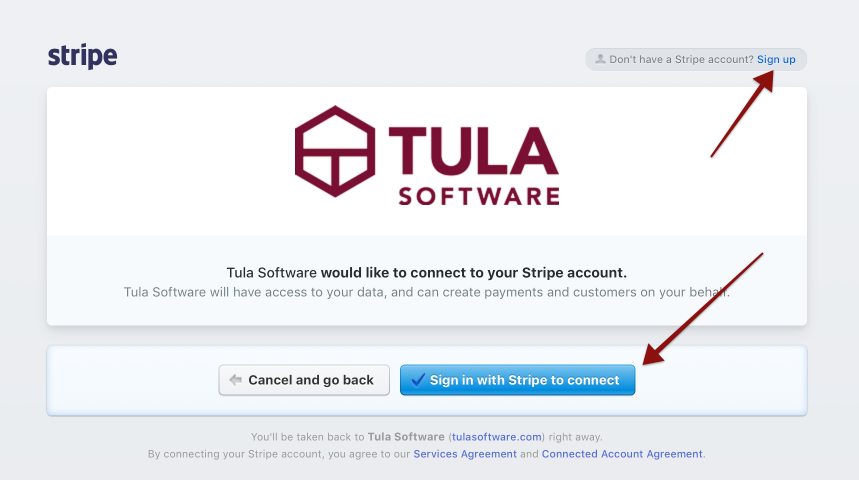
If you have an existing Stripe account you can sign in to connect it to Tula. If you are new to Stripe then sign up to create an account.
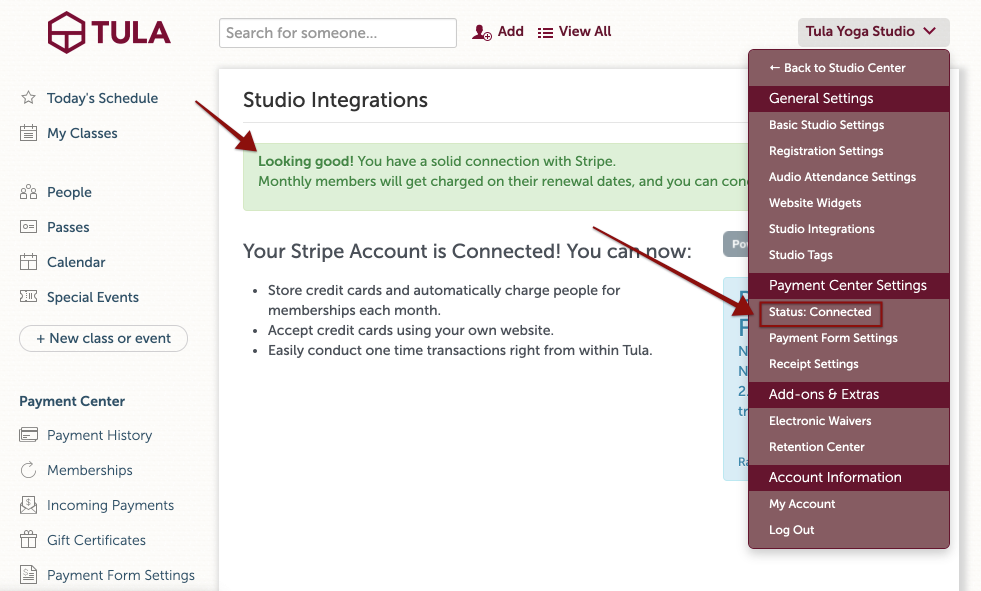
Once your Stripe account is connected the payment center status will be connected.
Create Custom Subdomain
To ensure a quality experience for your students, we recommend hosting the Tula Software widgets on your own domain.
Tula Software allows you to host your calendar, payment form and student access widgets right on your own domain! It's fast and easy to set up.
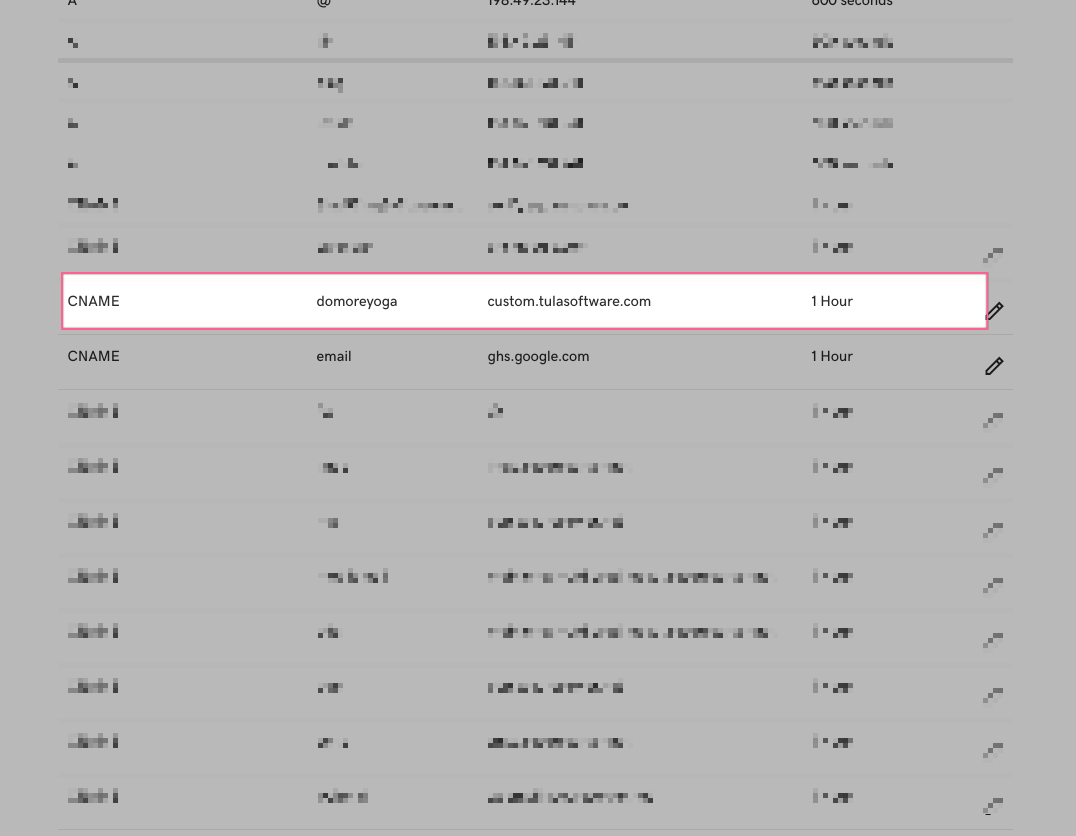
- Create a subdomain by going to your domain registrar to create a CNAME record for your domain, and point it to 'custom.tulasoftware.com. This will allow you to create a subdomain for your studio such as 'app.mystudioname.com'
2. Contact Tula Software support and send us the CNAME you created so we can issue the SSL certificates on your domain, and test the routing.
3. Update your website widgets with your new custom url!
Video Tutorial
For an in depth overview of setting up custom sub-domains and the problems it solves, check out the video tutorial below! **(Please ignore the step to add the subdomain to your Tula account as our support team will take care of this step for you!)
Setup Online Store
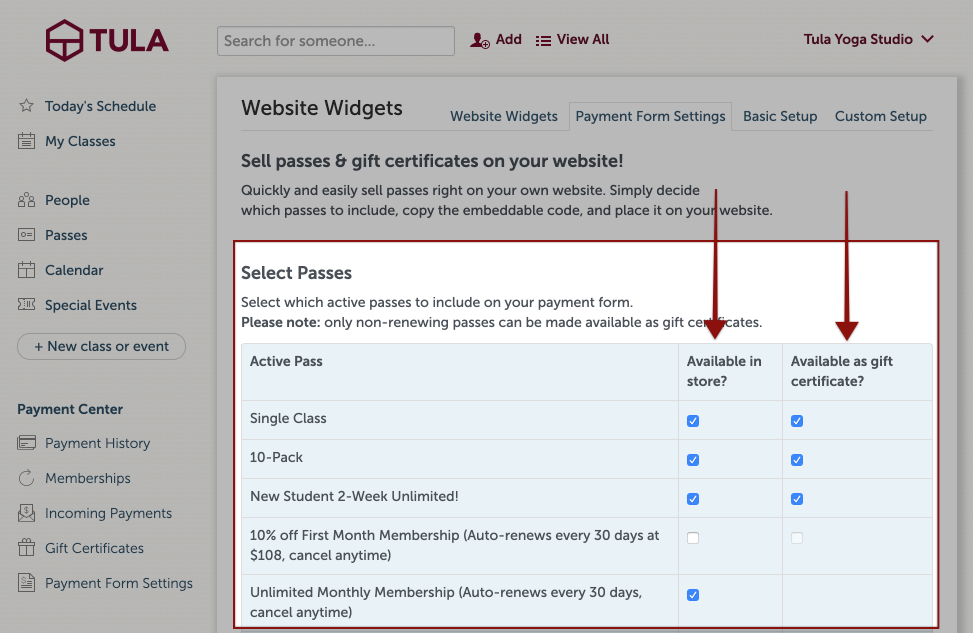
Now that Stripe is connected and the custom subdomain is setup, you can setup your online store. Your online store is the embedded payment form that you put on your website so students can make online purchase. You control what passes are available to purchase by going to payment form settings that is under payment center in the left navigation of Tula.

Select the passes you want in your online and also what passes you what available to buy as a gift pass then save.
Receipt Settings
To setup your receipt go to menu -> receipt settings.

When you charge someones credit card, you can choose whether or not you would like them to receive a receipt. You can customize the from name, reply-to email address, subject and also create a custom message.
Once you are done customizing the receipt you can save it and send out a test email to yourself to make sure looks awesome!
Note: This test email will be sent to the email address associated with your account, and will be addressed to you.
Migrate Credit Card Info to Stripe
If you would like to move your info from your current merchant service provider, Stripe will do it for free. Reach out to their support team to get the ball rolling. Stripe will work with your current provider to more over sensitive credit card data. Once the process is complete contact us and we can work with Stripe to get credit card info pull down to your Tula account.
NOTE: Though Stripe does not charge to migrate info to/from Stripe, your other provider might so it is a good idea to check with them before proceeding.
Import Student information
If you have an existing email list you want to start off with, Tula Software can help you import all your students at once. If you have students with existing packages we can help you get them set up with their proper account balances as well. Simply send us a spreadsheet with a column for the first name, last name, email address, telephone number, # of credits remaining, date of credit expiration. Once you have your file ready you can send it to us and we can schedule a time to complete the import.
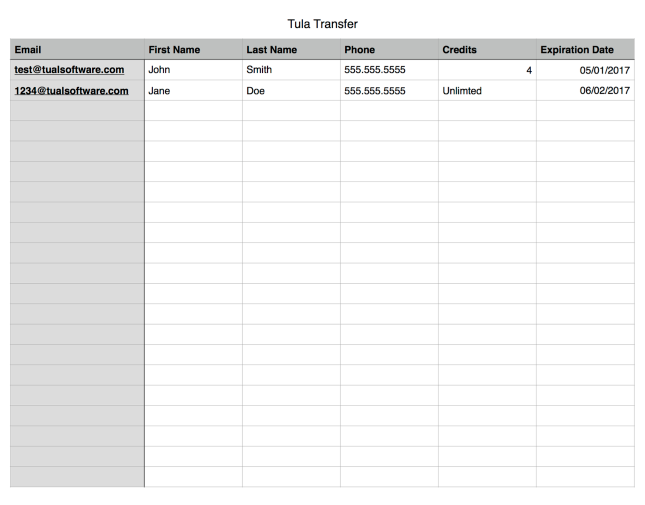
NOTE: Student with credits will receive a Migration pass giving them the correct amount of credits from the spreadsheet and the expiration date. If they are unlimited then they will receive an Unlimited Migration pass. If you choose to not import your credit card info then you will need to capture credit cards in Tula to continue charging your members monthly. Questions?
Embed Website Widgets
Congratulations! If you have come this far you are ready to embed our website widgets and go live with Tula Software. Below is an overview on how to get the codes you need to embed the widgets. If you need a more in-depth look at the on how to setup and customize the widgets, check this out!
First, go to the payment form settings page and select the passes you want available online and for gift purchase.
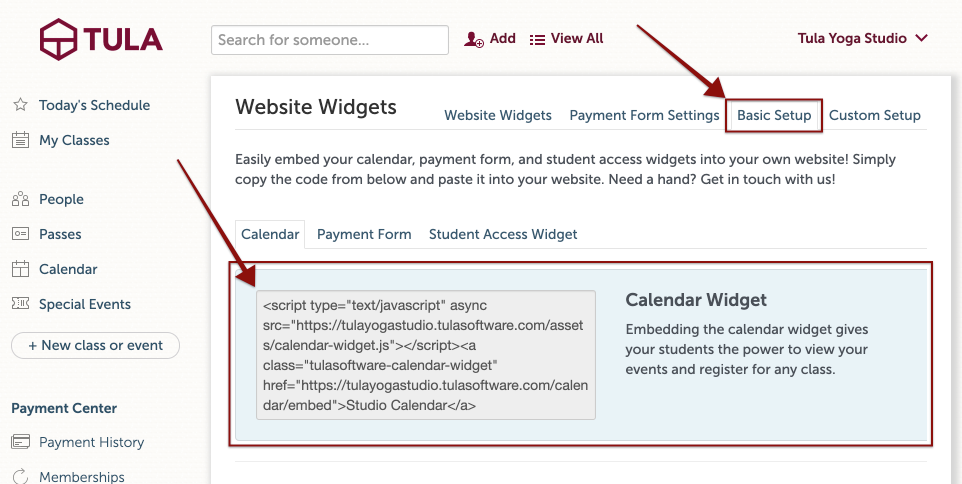
From the same page click on the basic setup tab and copy the code in the blue box for the calendar. Paste this code into the backend of your website where you want the calendar to be.
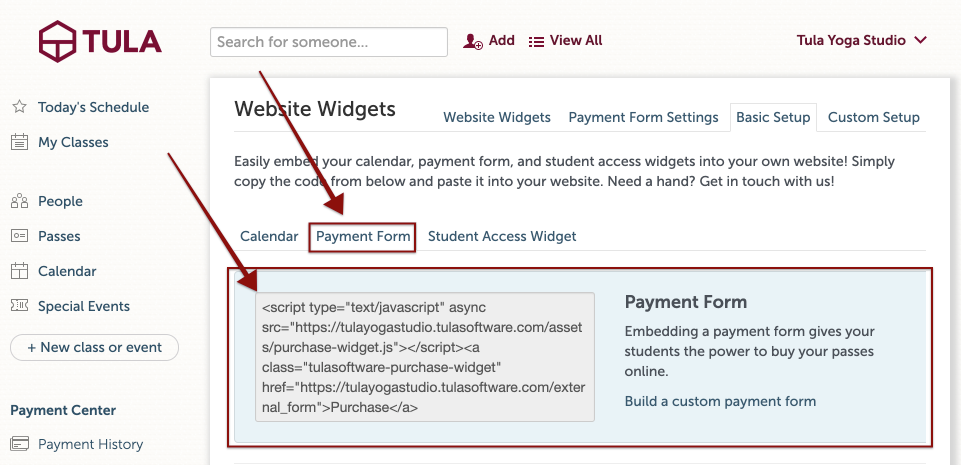
Now click on the payment form tab and copy the code in the blue box to embed the payment form.
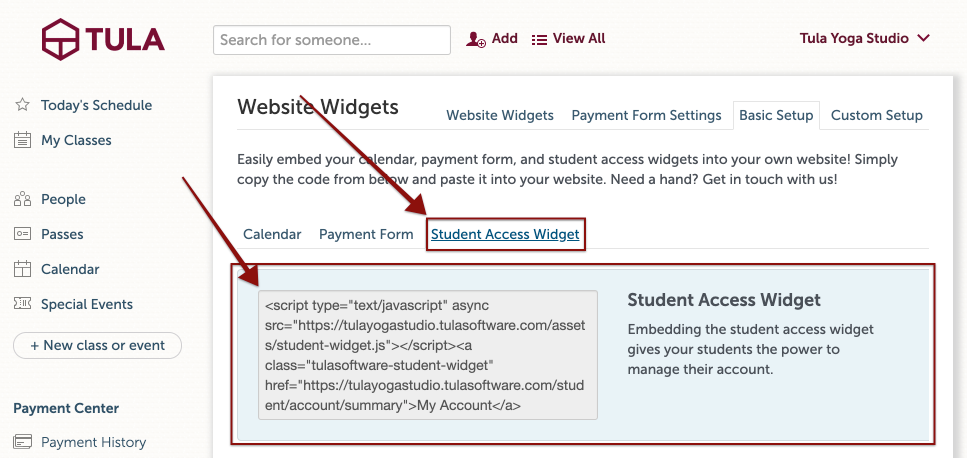
And lastly, click on the student access widget, copy code in blue box and embed into your website.
We also have an Event Recording widget that you can use. Check out our docs about Event recordings for more info!
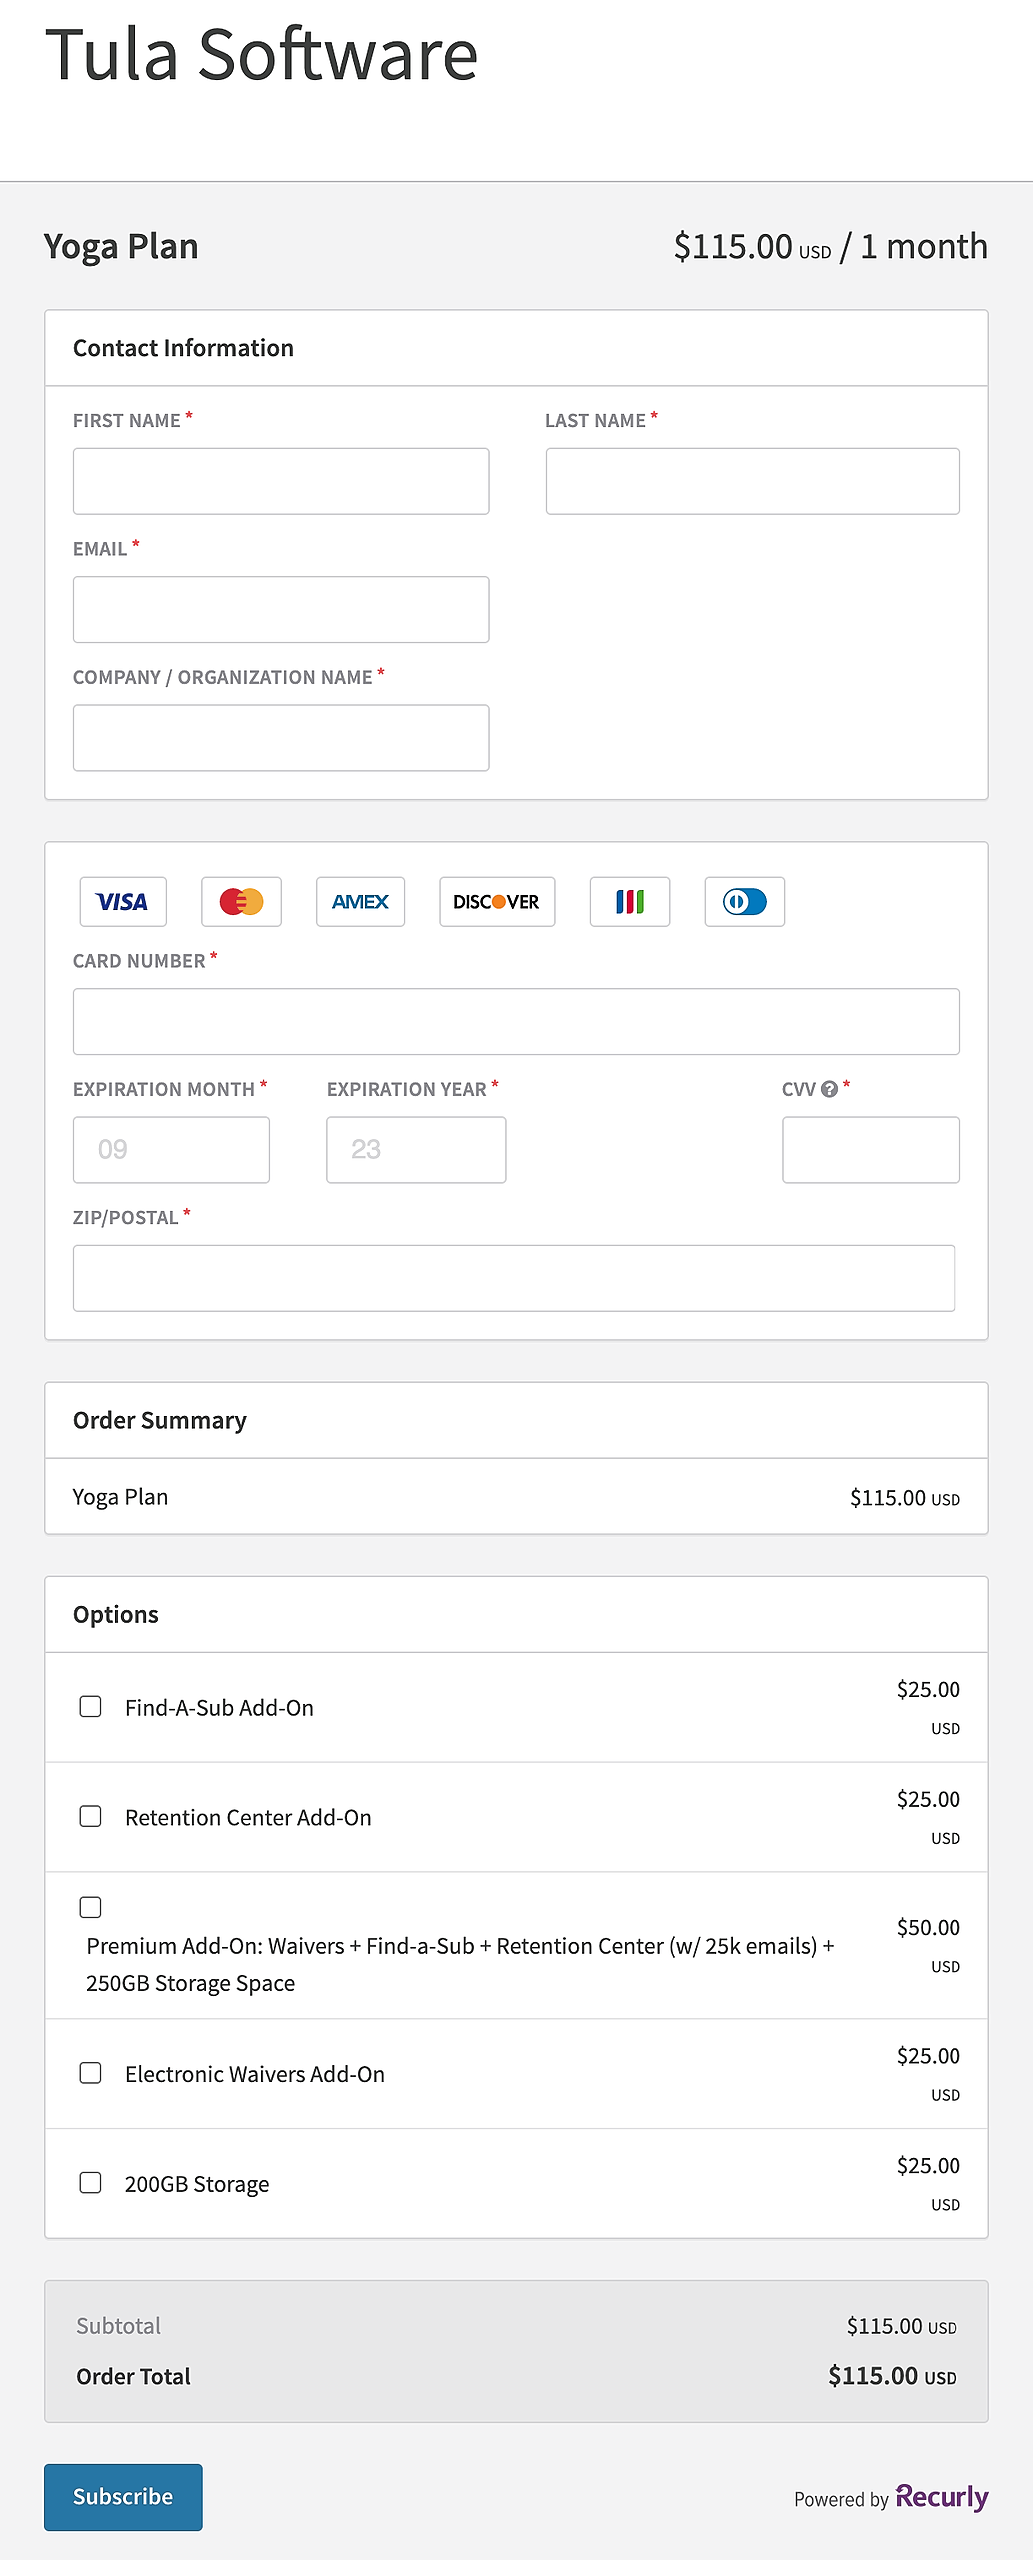
Upgrade Tula Account
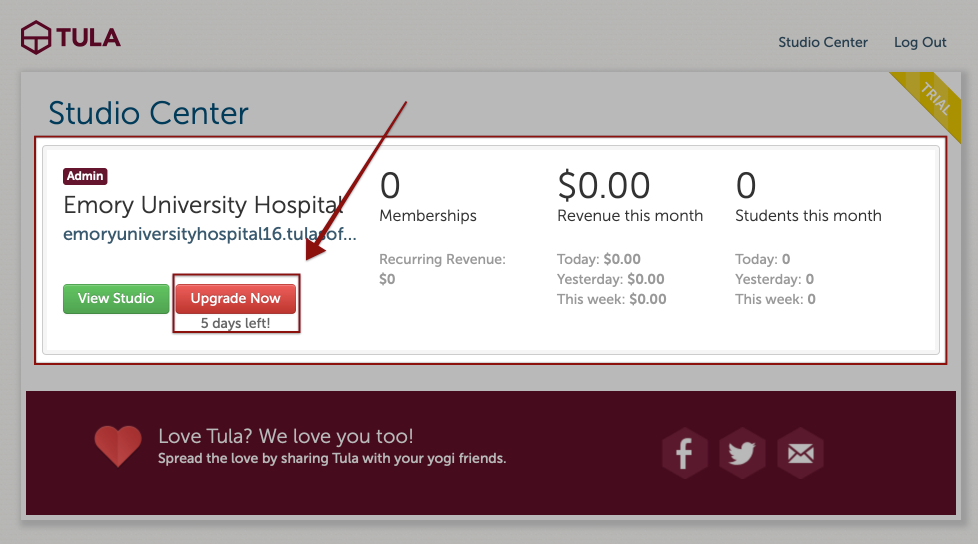
Now you are all setup and ready to upgrade your Tula account to a paid subscription. There are two places you can upgrade, one is on the studio center page when you first login.
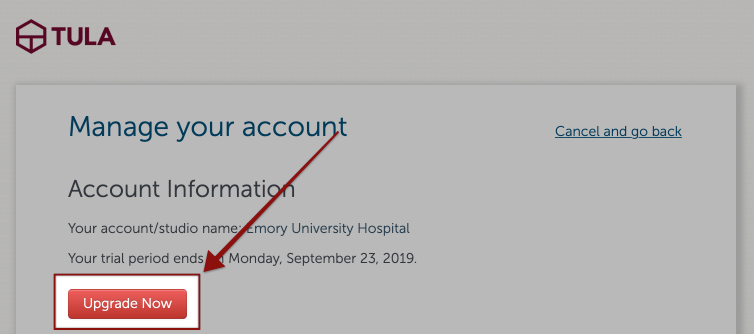
The other is on the my account page by going to the menu on the top right with your studio name and select My Account. From there, click the upgrade button.
Lastly, select your add ons, add your payment details and subscribe! Once you have subscribed we will reach out to help with any open items, questions or issues that may have come up!